Custom wire harness manufacturing is a multi-step process that requires accurate wire preparation, controlled crimping, correct connector assembly, proper protection, and complete testing before shipment. For OEM projects, a clear process helps reduce defects, improve repeatability, and support smooth transition from prototype to production.
This guide gives buyers and engineers a practical look at how a custom wire harness is manufactured, what quality checks are used at each stage, and what information helps suppliers build reliable cable assemblies faster.
Table of Contents
- 1. Wire Cutting and Stripping
- 2. Pre-Assembly and Seal Installation
- 3. Terminal Crimping
- 4. Sub-Assembly and Connector Insertion
- 5. Harness Board Assembly
- 6. Taping, Looming and Visual Inspection
- 7. Electrical Testing and Final Quality Check
- 8. Wire Harness Manufacturing Quality Gates
- 9. How Cablum Supports Prototype and OEM Production
- 10. FAQ
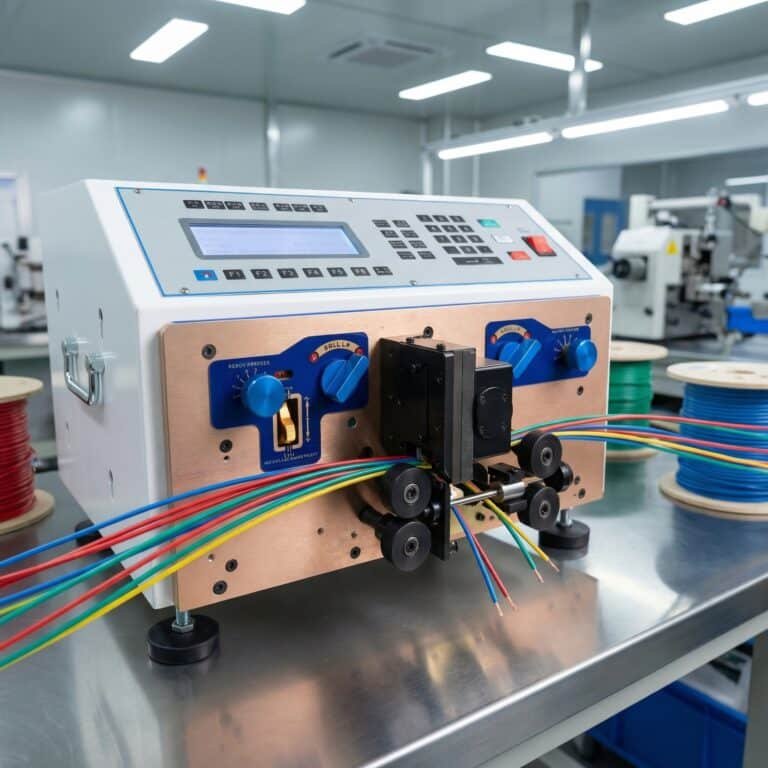
Step 1: Wire Cutting and Stripping
The manufacturing process begins with wire cutting and stripping. Wires are cut according to the approved drawing, BOM, work instruction, or DFM review. Length tolerance should match the harness length, routing requirement, installation condition, and customer specification.
Strip length is also critical. If the strip length is too short, the conductor may not seat correctly in the terminal. If it is too long, exposed conductor may create fit or short-circuit risks. Blade condition should be checked regularly to reduce the risk of nicked or damaged conductor strands.
Step 2: Pre-Assembly and Seal Installation
Before terminal crimping or connector insertion, many harnesses require pre-assembly work. This may include installing heat shrink tubing, wire seals, waterproof plugs, labels, sleeves, clips, or other components that must be placed onto the wire before the final assembly stage.
This step is especially important for automotive wire harnesses, waterproof cable assemblies, industrial harnesses, and outdoor equipment cables where sealing and protection require correct component sequence.
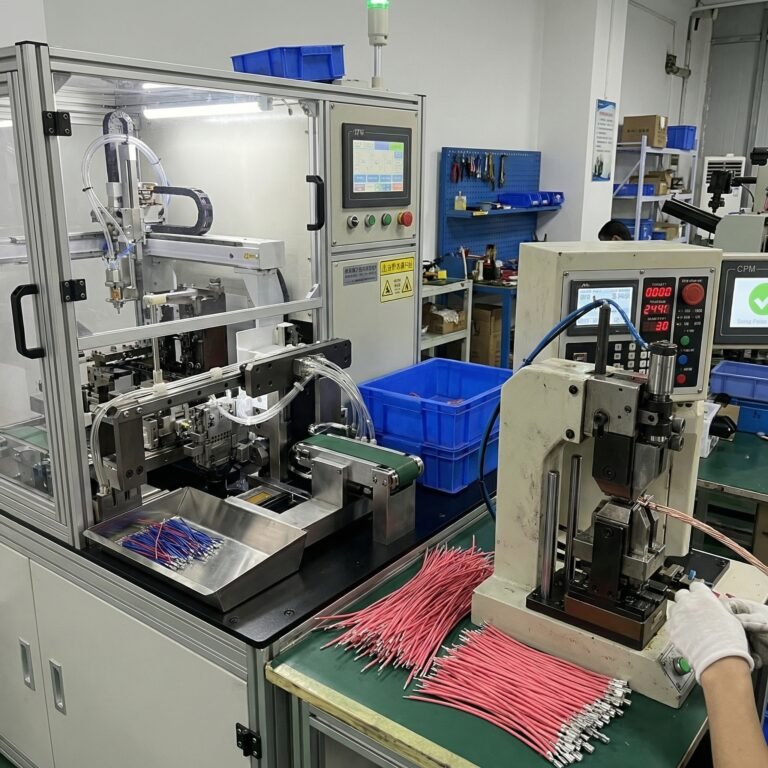
Step 3: Terminal Crimping
Terminal crimping is one of the most important processes in wire harness manufacturing. A proper crimp creates a gas-tight mechanical connection between the conductor and terminal barrel. Crimp quality depends on terminal-wire matching, strip length, crimp height, applicator setup, operator control, and inspection.
Depending on the terminal type and production setup, crimp force monitoring may be used to help detect process anomalies. Pull-force testing, crimp height checks, visual inspection, and cross-section analysis can also be used according to customer requirements and IPC/WHMA-A-620-based criteria.
“Reliable crimping is not only about pressing a terminal. It requires the correct wire, terminal, tooling, crimp profile, inspection method, and production discipline.”
Related Reading
For more detail, read our Wire Harness Crimping Guide and Terminal Cross-Section Analysis Guide .
Step 4: Sub-Assembly and Connector Insertion
After crimping, terminals are inserted into connector housings according to the pinout and assembly drawing. Correct insertion is essential because an incorrectly seated terminal can lead to intermittent contact, locking failure, or miswire issues during electrical testing.
For many connectors, operators must confirm terminal orientation, insertion depth, locking sound or feel, secondary lock position, and wire pull-back condition. This helps ensure the terminal is properly seated before the harness moves to board assembly.
Step 5: Harness Board Assembly
Complex wire harnesses are assembled on a 1:1 scale harness board, also called a nailboard or assembly board. The board controls routing, branch length, connector position, breakout direction, clips, labels, and protective parts.
Harness board assembly helps ensure each branch follows the approved layout. It also reduces dimensional variation and helps operators build repeatable assemblies across prototype, pilot, and production runs.
Step 6: Taping, Looming and Visual Inspection
After the harness is routed and connected, protective coverings are applied according to the application. These may include PVC tape, fleece tape, cloth tape, corrugated tubing, braided sleeve, heat shrink, labels, clips, or other protection materials.
Protection choices should match the routing environment. Interior harnesses may focus on flexibility and noise reduction, while engine bay, chassis, outdoor, or industrial applications may require stronger abrasion, heat, fluid, or impact protection.
Visual inspection checks whether the harness matches the drawing, whether the taping is secure, whether wires are exposed, whether labels are correct, and whether connectors and clips are positioned properly.
Related Reading
For protection material selection, read our Automotive Wire Harness Taping Guide .
Step 7: Electrical Testing and Final Quality Check
Before shipment, wire harnesses should be electrically tested according to the project requirements. A computerized electrical tester can check for open circuits, short circuits, miswires, and continuity problems.
For some projects, additional checks may include insulation resistance, hipot testing, functional testing, resistance measurement, label verification, packing inspection, and customer-specific documentation.
Wire Harness Manufacturing Quality Gates
Quality should be checked throughout the manufacturing process, not only at the end. The table below shows common quality gates used in custom wire harness production.
| Process Stage | Quality Check | Why It Matters |
|---|---|---|
| Cutting & Stripping | Wire length, strip length, insulation damage, conductor nicking. | Prevents poor crimping, fit issues, and conductor damage. |
| Pre-Assembly | Seals, heat shrink, labels, sleeves, clips, and part sequence. | Avoids missing parts and rework after crimping or connector assembly. |
| Crimping | Crimp height, pull force, terminal position, conductor brush, visual check. | Protects electrical stability and mechanical retention. |
| Connector Insertion | Pin position, locking, secondary lock, pull-back confirmation. | Reduces miswire and intermittent contact risks. |
| Harness Board Assembly | Branch length, routing, connector location, clip and label position. | Ensures the harness fits the final equipment or vehicle layout. |
| Taping & Looming | Overlap, exposed wires, branch protection, tube position, tape ends. | Improves protection, appearance, routing stability, and durability. |
| Electrical Testing | Open circuit, short circuit, miswire, continuity, and project-specific tests. | Confirms electrical function before shipment. |
| Final Inspection | Labels, packing, documentation, quantity, appearance, and customer requirements. | Supports consistent delivery and customer approval. |
How Cablum Supports Prototype and OEM Production
Cablum supports OEM customers with custom wire harness and cable assembly manufacturing, from early engineering review to prototype builds and production support.
For new projects, our team can review drawings, BOMs, connector part numbers, wire gauge, protection requirements, testing requirements, and target quantities before production begins. This helps identify cost, sourcing, manufacturability, and quality risks early.
DFM Review
Review drawings, BOM, connectors, wire sizes, tolerances, protection materials, and test requirements.
Prototype Build
Build engineering samples for fit, function, assembly review, and design verification.
Low-Volume Production
Support early-stage production, pilot runs, and high-mix wire harness builds.
OEM Production Support
Support repeatable production with work instructions, inspection planning, and electrical testing.
Related Case Study
See how early engineering review helped reduce cost in our Wire Harness DFM Case Study .
Need a Reliable Wire Harness Manufacturing Partner?
Send us your drawing, BOM, connector list, wire gauge, sample photos, and target quantity. Cablum can help review manufacturability, production process, quality checks, and testing requirements.